Master Your Small Business Point of Sale Software A Complete Setup and Usage Guide
Modern small businesses demand more than basic transaction processing; they require robust pos software to drive efficiency and growth. The ongoing shift towards integrated cloud-based systems now allows seamless inventory management, advanced customer relationship tracking. real-time sales analytics, crucial for adapting to dynamic market trends like contactless payments and omnichannel retail. Effectively configuring your chosen system, from setting up product SKUs to integrating payment gateways and configuring loyalty programs, directly impacts operational fluidity and customer satisfaction. Mastering these technical configurations unlocks the full potential of your business, transforming raw data into actionable insights for strategic decision-making and enhanced customer experiences.
Understanding Point of Sale (POS) Software: The Core of Modern Retail
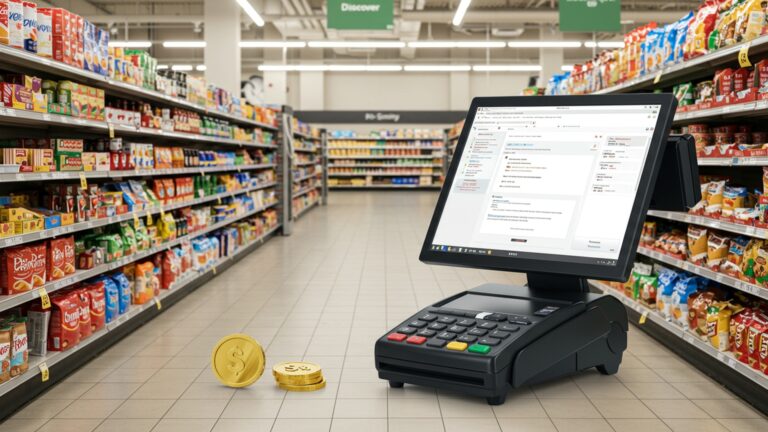
For any small business navigating today’s competitive landscape, a robust Point of Sale (POS) system is no longer a luxury but a fundamental necessity. At its heart, POS software is the digital brain that processes transactions. its capabilities extend far beyond simply ringing up sales. It’s an integrated system that manages various aspects of your business operations, from inventory tracking to customer relationship management.
A POS system typically consists of two main components: the hardware and the software. The hardware includes physical devices like a cash register, barcode scanner, receipt printer. payment terminal. The POS software, on the other hand, is the program that runs on a computer, tablet, or smartphone, facilitating all the data processing and operational tasks. Investing in quality POS software can significantly streamline operations, enhance customer experience. provide invaluable insights into your business performance.
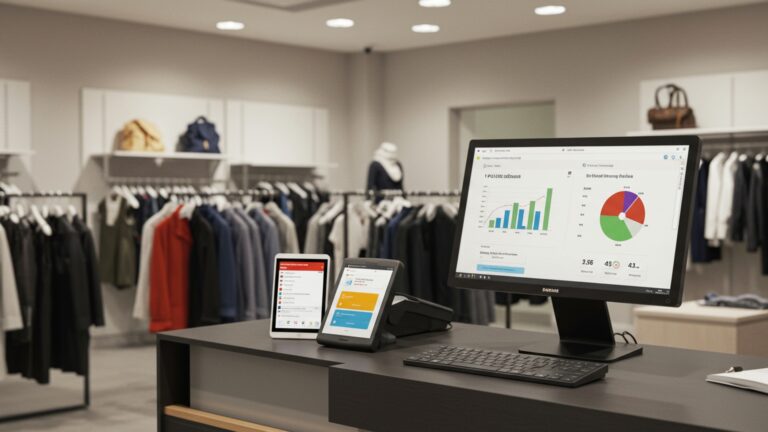
Consider a small boutique that implemented a modern POS system. Before, managing inventory was a manual, time-consuming task prone to errors. After integrating the new POS software, every sale automatically updates stock levels, preventing overselling and simplifying reordering. This real-world application demonstrates how effective POS software can transform efficiency.
Key Features to Prioritize When Choosing Your POS Software
Selecting the right POS software is crucial for your business’s success. While many options exist, focus on features that directly address your operational needs and growth ambitions. Here’s a breakdown of essential capabilities:
- Sales Processing & Transaction Management: This is the core function, allowing for quick and accurate processing of sales, returns. exchanges. Look for intuitive interfaces, split payment options. the ability to apply discounts and gift cards.
- Inventory Management: Beyond basic stock tracking, robust POS software should offer real-time inventory updates, low-stock alerts, vendor management. product variant support (e. g. , different sizes or colors).
- Customer Relationship Management (CRM): Capture customer data, track purchase history, manage loyalty programs. segment customers for targeted marketing efforts. This builds stronger customer relationships and encourages repeat business.
- Reporting & Analytics: Gain actionable insights into sales trends, popular products, employee performance. peak hours. Comprehensive reports are vital for making informed business decisions.
- Employee Management: Track employee hours, manage shifts, set permissions for different roles. monitor individual sales performance.
- Integrations: Seamless connectivity with other business tools like accounting software (e. g. , QuickBooks, Xero), e-commerce platforms (e. g. , Shopify, WooCommerce). marketing tools.
- Hardware Compatibility: Ensure the software supports your desired hardware, including barcode scanners, receipt printers, cash drawers. various payment terminals.
- Mobile POS Capabilities: For businesses on the go or those seeking flexibility, mobile POS solutions (often tablet-based) allow transactions anywhere, enhancing customer service and efficiency.
Comparison of Basic vs. Advanced POS Software Features
To illustrate the range of features, here’s a comparison:
| Feature Category | Basic POS Software | Advanced POS Software |
|---|---|---|
| Sales Processing | Cash/Card transactions, basic returns | Split payments, gift cards, loyalty points, layaways, custom discounts |
| Inventory | Manual stock entry, basic tracking | Real-time updates, low-stock alerts, vendor management, product variants, inventory transfers |
| Customer Management | Basic customer data capture | Detailed purchase history, loyalty programs, customer segmentation, marketing integrations |
| Reporting | Daily sales summaries | Detailed sales trends, profit margins, employee performance, peak hour analysis, custom reports |
| Employee Management | Basic clock-in/out | Shift scheduling, role-based permissions, sales commissions tracking |
| Integrations | Limited to none | Accounting, e-commerce, marketing, payroll, CRM, appointment scheduling |
| Hardware Support | Specific, limited devices | Wide range of devices, mobile POS options |
Choosing the Right POS Software for Your Business
The “best” POS software isn’t a one-size-fits-all solution; it’s the one that perfectly aligns with your specific business model and needs. Consider these factors:
- Industry-Specific Needs:
- Retail: Requires strong inventory management, barcode scanning. multi-location support.
- Restaurants/Cafes: Needs table management, kitchen display systems (KDS), order customization. tip management.
- Service Businesses (Salons, Spas): Benefits from appointment scheduling, client management. staff booking features.
- Budget: POS software comes with various pricing models:
- Subscription-based (SaaS): Monthly or annual fees, often tiered based on features or number of terminals. This typically includes updates and support.
- One-time Purchase: Less common now. some legacy systems offer this, often with separate fees for updates and support.
- Factor in hardware costs, payment processing fees. potential integration costs.
- Scalability: Choose a system that can grow with your business. If you plan to open new locations or expand product lines, ensure your POS software can handle increased volume and complexity without requiring a complete overhaul.
- Ease of Use: An intuitive interface reduces training time for employees and minimizes errors during transactions. A complex system, no matter how feature-rich, can hinder efficiency.
- Customer Support: Evaluate the provider’s support options (24/7, phone, email, chat) and response times. Reliable support is critical when issues arise, especially during peak business hours.
- Security: Ensure the POS software is PCI compliant and offers robust security features to protect sensitive customer and business data.
Hardware Essentials for Your POS System
While the POS software is the brains, the hardware provides the hands and feet. A functional POS system requires several key pieces of equipment:
- POS Terminal/Tablet: This is the main interface where transactions are processed. It could be a dedicated POS terminal, an iPad, an Android tablet, or even a standard desktop computer. Tablets offer portability and a sleek aesthetic.
- Barcode Scanner: Speeds up checkout and ensures accurate inventory management by quickly inputting product details. Options include handheld, fixed, or wireless scanners.
- Receipt Printer: Essential for providing customers with physical proof of purchase. Thermal printers are common for their speed and quiet operation, not requiring ink.
- Cash Drawer: A secure place to store cash, connected to the POS system to open automatically upon cash transactions.
- Payment Terminal (Card Reader): Processes credit and debit card payments. Look for devices that support EMV chip cards, NFC (tap-to-pay). magstripe. Many modern terminals integrate directly with the POS software for seamless processing.
The Complete Setup Guide: Getting Started with Your POS Software
Setting up your POS software might seem daunting. by following a structured approach, you can get your system up and running efficiently. This guide provides actionable steps for a smooth implementation.
Step 1: Initial Software Installation & Account Setup
Once you’ve chosen your POS software, the first step is to install it (if it’s not cloud-based) and configure your primary account.
- Cloud-based (SaaS): You’ll typically receive login credentials for a web portal. Access your dashboard through a web browser.
- On-premise: Download and install the software onto your designated computer. Follow the on-screen prompts.
During the initial setup, you’ll usually be prompted to:
- Create your administrator account.
- Enter your business name, address. contact insights.
- Define your store’s operating hours and timezone.
Actionable Takeaway: Keep your login credentials secure. Bookmark your cloud POS portal for easy access.
Step 2: Product & Inventory Configuration
This is arguably the most critical and time-consuming step. Accurate product data is the backbone of effective POS software.
- Add Products: Manually enter each product or use a bulk import feature (e. g. , via CSV file). For a cafe, this might involve items like “Latte,” “Espresso,” “Croissant.” For a retail store, it could be “Men’s T-Shirt (Blue, Large).”
- Details for Each Product:
- Product Name & Description: Clear and concise.
- SKU (Stock Keeping Unit): Unique identifier for each product. If you don’t have one, the POS software can often generate it.
- Price: Retail price.
- Cost Price: What you pay for the product (essential for profit reporting).
- Tax Rate: Assign applicable sales tax.
- Categories/Tags: Organize products for easier searching and reporting (e. g. , “Beverages,” “Apparel,” “Electronics”).
- Variants: If a product comes in different sizes, colors, or other options, configure these. Each variant should have its own SKU and stock level.
- Stock Levels: Enter your current inventory count for each product and variant.
- Reorder Points: Set a minimum stock level that triggers an alert to reorder.
- Supplier data: Link products to their respective suppliers for easy reordering.
Example of CSV data for bulk import:
Product Name,SKU,Price,Cost,Category,Stock,Variant Type,Variant Value
Coffee Mug,"CM001",12. 99,6. 00,Homeware,50,Color,Blue
Coffee Mug,"CM002",12. 99,6. 00,Homeware,45,Color,Red
T-Shirt,"TS001",24. 99,10. 00,Apparel,30,Size,Small
T-Shirt,"TS002",24. 99,10. 00,Apparel,40,Size,Medium
Actionable Takeaway: Dedicate ample time to this step. Accuracy here prevents major headaches later. Consider using a barcode label printer once products are in the system.
Step 3: Employee & User Management
Grant access to your team members and define their roles and permissions.
- Create User Accounts: For each employee who will use the POS software.
- Assign Roles: Define roles such as “Administrator,” “Manager,” “Cashier.”
- Set Permissions: Crucially, limit access based on roles. For example, cashiers might only be able to process sales and returns, while managers can access reports and adjust inventory. Administrators have full control.
Actionable Takeaway: Regularly review employee permissions, especially when staff roles change or new employees are hired.
Step 4: Payment Gateway Integration
Connect your chosen payment processor to your POS software to accept credit and debit card payments.
- Select a Payment Processor: Options include Square, Stripe, PayPal, Worldpay, etc. Ensure it integrates with your POS system.
- Connect Account: Your POS software will guide you through linking your payment processor account. This usually involves entering API keys or logging into your processor’s portal through the POS interface.
- Configure Payment Types: Set up accepted payment methods (Cash, Credit Card, Debit Card, Gift Card, Mobile Pay).
Actionable Takeaway: Confirm that test transactions go through successfully before going live. grasp the transaction fees associated with your chosen processor.
Step 5: Hardware Connection & Testing
Connect all your physical POS hardware components and ensure they communicate correctly with the POS software.
- Connect Devices: Plug in your receipt printer, barcode scanner, cash drawer. payment terminal. Many modern devices connect via USB, Bluetooth, or Ethernet.
- Install Drivers (if needed): Some hardware might require specific drivers, typically available from the manufacturer’s website.
- Configure in POS Software: Go to your POS settings (often labeled “Hardware” or “Printers”) and add/configure each device.
- For a receipt printer, you might select the printer from a dropdown list and perform a test print.
- For a barcode scanner, you typically just need to ensure it’s connected and responds when scanning an item in the POS.
- For a cash drawer, ensure it’s connected to the receipt printer (if triggered by print command) or directly to the terminal.
- Test All Components: Perform a dummy transaction to confirm the scanner works, the receipt prints, the cash drawer opens. card payments process correctly.
Actionable Takeaway: Don’t skip testing! A non-functional piece of hardware can bring your checkout to a halt. Keep user manuals handy for troubleshooting.
Step 6: Tax & Discount Settings
Accurately configure sales taxes and set up any promotional discounts.
- Sales Tax: Define the applicable sales tax rates for your region. Many POS software allow for different tax rates based on product categories or customer location.
- Discounts & Promotions: Set up various discount types:
- Percentage-based: e. g. , “10% off entire purchase.”
- Fixed amount: e. g. , “$5 off.”
- Buy One Get One (BOGO): e. g. , “Buy one, get one 50% off.”
- Automated discounts: Apply automatically when certain conditions are met.
- Manual discounts: Require staff to apply them.
Actionable Takeaway: Regularly review tax laws and update your POS software settings accordingly. Clearly train staff on how to apply discounts.
Step 7: Customer Management & Loyalty Programs
Leverage your POS software to build customer relationships.
- Customer Database: Configure fields for capturing customer data (name, email, phone number, birth date).
- Loyalty Program Setup: If your POS software includes this feature, set up points systems (e. g. , 1 point per dollar spent), reward tiers. redemption options.
Actionable Takeaway: Encourage staff to collect customer details at checkout. This data is invaluable for targeted marketing and building loyalty.
Daily Operations: Using Your POS Software Effectively
Once your POS software is set up, understanding daily workflows is key to maximizing its benefits.
- Processing Sales:
- Scanning Items: Use the barcode scanner or manually select products from the catalog.
- Applying Discounts: Enter manual discounts or apply active promotions.
- Selecting Payment Method: Choose cash, credit card, debit card, gift card, etc.
- Completing Transaction: Process payment, print/email receipt. open cash drawer if applicable.
- Split Payments: Allow customers to pay using multiple methods (e. g. , half cash, half card).
- Returns and Exchanges:
- Locate the original transaction (often via receipt number or customer history).
- Select items being returned or exchanged.
- Process refund to original payment method or issue store credit/new item.
- Opening and Closing Procedures:
- Opening: Count the starting cash float in the drawer and reconcile it with the POS system’s recorded start amount.
- Closing: Reconcile daily sales against cash, card. other payment types. Count the cash drawer, verify against the POS report. deposit excess cash. This process is often called “X-report” (mid-day summary) and “Z-report” (end-of-day final summary).
- Inventory Adjustments:
- Manually adjust stock levels for damaged goods, spoilage, or transfers between locations.
- Conduct periodic stocktakes using the POS system’s inventory counting features.
- Reporting and Analytics: Regularly access your POS software’s reporting features to monitor performance.
- Sales Reports: examine daily, weekly, monthly. yearly sales, broken down by product, category, or employee.
- Product Performance: Identify best-selling and slow-moving items to optimize purchasing and promotions.
- Employee Performance: Track individual sales, transaction counts. average transaction values.
- Customer Reports: grasp customer spending habits and loyalty program effectiveness.
Advanced Tips & Best Practices for Maximizing Your POS Software
To truly master your POS software and unlock its full potential, consider these advanced strategies:
- Regular Data Backups: Even with cloud-based systems, understanding how to export your data periodically provides an extra layer of security. For on-premise systems, scheduled backups are non-negotiable.
- Comprehensive Staff Training: Don’t just show them the basics. Train staff on advanced features, troubleshooting common issues. how to leverage the POS for better customer service (e. g. , looking up customer purchase history). Role-play various scenarios.
- Leveraging Reports for Business Decisions: Go beyond just looking at the numbers.
- Identify peak sales hours to optimize staffing.
- review product performance to inform inventory ordering and marketing campaigns.
- Spot trends in returns or discounts to address underlying issues.
- Utilizing Integrations: Connect your POS software with other business tools:
- Accounting Software: Automate sales data transfer, reducing manual entry and errors.
- E-commerce Platform: Synchronize inventory and customer data between your physical store and online presence.
- Marketing Automation: Use customer data from your POS to send targeted emails or promotions.
- Security Best Practices:
- Use strong, unique passwords for all POS accounts.
- Implement two-factor authentication (2FA) if available.
- Regularly update your POS software to benefit from the latest security patches.
- Restrict physical access to POS terminals and cash drawers.
- Train staff on phishing awareness and data security.
- Mobile POS Adoption: If your POS software supports it, consider using mobile terminals or tablets for line busting during busy periods, taking orders on the floor, or for pop-up shops. This significantly enhances flexibility and customer service.
Troubleshooting Common POS Software Issues
Even with the best preparation, issues can arise. Here’s how to approach common problems with your POS software:
- Connectivity Problems (Internet, Network):
- Symptom: POS software can’t connect to the internet, payment processor, or other networked devices.
- Solution: First, check your internet connection (router, modem). Restart network devices. Ensure cables are securely connected. If using Wi-Fi, check signal strength. For cloud POS, try accessing the portal from another device or browser.
- Hardware Malfunctions (Printer, Scanner, Drawer):
- Symptom: Receipt printer isn’t printing, scanner isn’t reading, cash drawer isn’t opening.
- Solution:
- Printer: Check paper, power. USB/Ethernet connection. Restart the printer. Ensure the correct printer is selected in POS software settings. Check for driver issues.
- Scanner: Ensure it’s powered on and connected. Test with a known good barcode. Check POS settings to ensure the scanner is recognized.
- Cash Drawer: Often connected via the receipt printer; ensure the printer is working. Check connections. Manually open if necessary to confirm it’s not jammed.
- Software Glitches (Freezing, Errors, Slow Performance):
- Symptom: The POS software freezes, displays error messages, or runs unusually slowly.
- Solution:
- Restart the application: Close and reopen the POS software.
- Restart the device: Reboot the computer or tablet running the POS.
- Clear cache/browser data: If it’s a web-based POS, clear your browser’s cache and cookies.
- Check for updates: Ensure your POS software is up-to-date. Providers frequently release patches for bugs and performance improvements.
- Contact Support: If issues persist, gather details (error messages, steps to reproduce) and contact your POS software provider’s support team.
- Payment Processing Issues:
- Symptom: Card payments are declining or not going through.
- Solution:
- Check the payment terminal for error messages.
- Ensure the terminal is connected and communicating with the POS software.
- Verify your internet connection.
- Contact your payment processor’s support directly, as the issue might be on their end.
Conclusion
Mastering your small business POS software isn’t merely about processing transactions; it’s about unlocking strategic growth. You’ve now gained the knowledge to confidently set up and utilize your system, transforming it from a simple cash register into a powerful business intelligence tool. My personal tip: routinely explore your POS reports, even the ones you think you don’t need. I once saw a small bookstore owner identify a surprising spike in niche manga sales through their weekly analytics, leading to a profitable inventory adjustment that leveraged a current trend. Embrace the actionable steps outlined in this guide – from meticulous product entry to staff training and regular software updates, especially with new features frequently rolling out in cloud-based systems, like enhanced mobile payment options. This proactive approach ensures you leverage functionalities such as integrated loyalty programs or real-time inventory tracking, which are crucial in today’s competitive market. Remember, your POS is a dynamic asset; continuous engagement will empower you to make data-driven decisions, streamline operations. ultimately propel your small business forward.
More Articles
How to Easily Set Up Mobile POS Software for Your Small Business
Boost Your Retail Profits How to Optimize Inventory Using POS Software
How to Optimize Your Billing Process Using Modern POS Software Solutions
7 Essential Tips to Prevent Billing Errors and Save Your Business Money
A Complete Guide to Choosing the Best POS Software for Retail
FAQs
I’m new to this. What’s the very first thing I need to do to get this POS system running?
The guide kicks off with a step-by-step setup process. You’ll start by installing the software, then configuring your basic business details like store name, currency. tax settings. After that, it walks you through connecting any hardware like a barcode scanner or receipt printer.
What kind of cool stuff can this POS software actually do for my small business?
This guide covers a ton of features designed to streamline your operations. You’ll learn how to handle sales, process various payment types, manage customer insights, track inventory in real-time, generate insightful sales reports. even manage staff access. It’s built to make running your business smoother.
Managing my products is a pain. Does this guide help with inventory tracking?
Absolutely! A big chunk of the guide is dedicated to mastering inventory management. You’ll discover how to add new products, track stock levels, set up reorder points, manage variations (like size or color). even conduct inventory counts efficiently. Say goodbye to stock-outs and overstocking!
What if I get stuck or something isn’t working right with the software?
Don’t worry, the guide includes a dedicated troubleshooting section that addresses common issues you might encounter. It offers practical solutions and tips for fixing problems with hardware connections, software errors, or transaction processing. Plus, understanding the setup well from the start often prevents many problems.
I need to know how my business is doing. Can this POS give me useful reports?
Yes, definitely! The guide dives deep into the reporting capabilities of the software. You’ll learn how to pull various reports, including daily sales summaries, product performance, customer purchase history. even employee sales. These reports are key for making smart business decisions.
Is it complicated for my employees to learn how to use this thing?
The guide focuses on making the software intuitive for everyone. It includes clear instructions and best practices for daily operations, making staff training a breeze. There are sections on processing sales, handling returns. using customer profiles, ensuring your team can get up to speed quickly.
Can I tweak the software to fit my specific type of business, or is it one-size-fits-all?
The guide highlights the software’s customization options. You’ll find out how to tailor settings like receipt layouts, product categories, discount rules. user permissions to perfectly match your business’s unique workflow and needs. It’s designed to be adaptable!